Robot Camp Opening Days!

By Jeremy Knowlton

Robot Camp blasted off on Monday with a buzz of excitement and creativity! On our first day, we set rules, discussed engineering constraints and criteria for our designs, and started building! 

Our first challenge focused on how to design strong structures. We discussed support beams as well as sturdy geometric shapes. We practiced these ideas by pairing up and building LEGO arms with "hands" made out of paper plates. Each hand was tested to see how many rocks it could hold. The catch: each pair got one M&M for each rock that their build held. So much excitement!

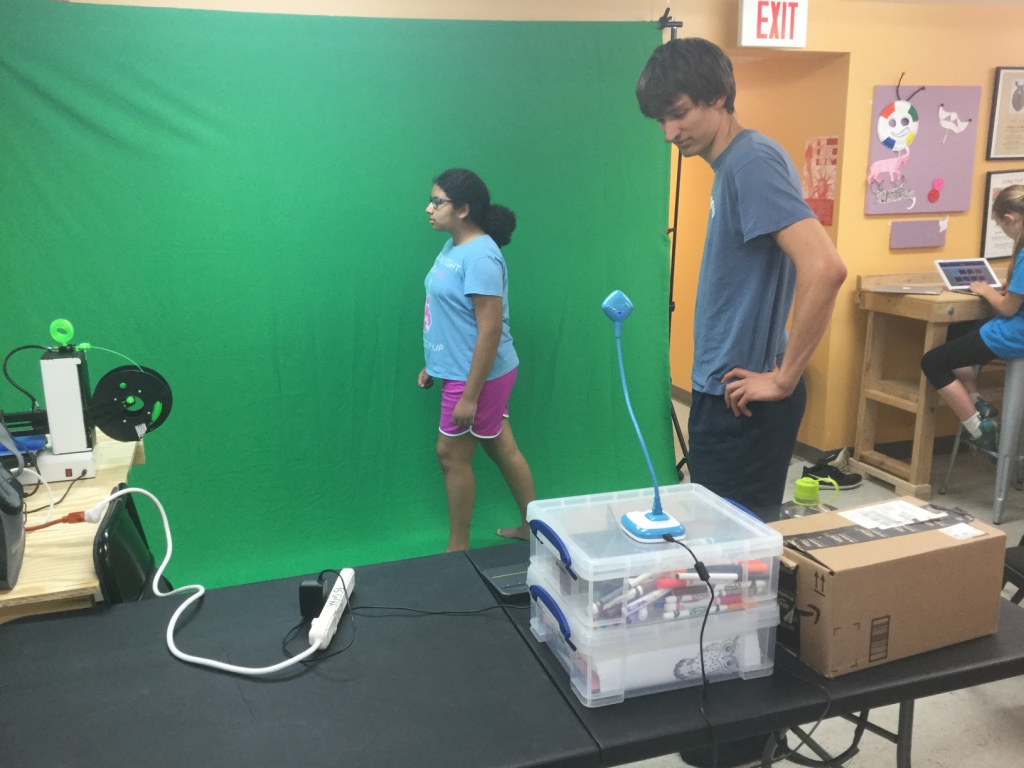
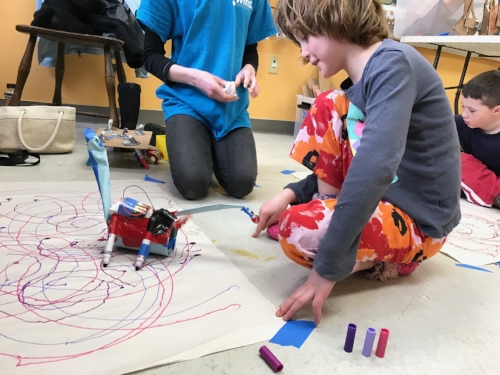
Later, we practiced coding by building some silly walkers. The criteria? Each build had to somehow move without wheels! Pairs excitedly brainstormed and, in no time, crazy dogs, octopi, floppy things, and spinning offsets were whirling around the room in chaotic enthusiasm! Students got really into loop patterns, coding different motor blocks to move their robotic legs in certain patterns. One group even added markers to their build, creating robotic pattern drawers that raced across paper in feverish creativity!

A very cool robotic walker!

A very cool robotic walker!

A very excited group brainstorming leg movement strategies!

A very excited group brainstorming leg movement strategies!

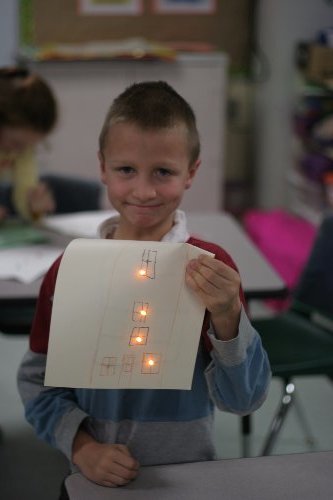
We also got to celebrate a very special birthday with a LEGO "cake" and 9 glowing LEDs!

To build any advanced robotic structure, gears are usually a very important tool engineers can use. Participants got to build gear "fishing rods" that used gear ratios to either build strong rods or fast rods. Of course, with any rod, you need some good fish to catch! Giggles filled the room as students caught laser cut fish from a "pond". A LEGO robot randomly swam around with these fish on its back as students lowered their magnetic "hooks" down to catch a tasty cardboard bass! Fun was had by all. 

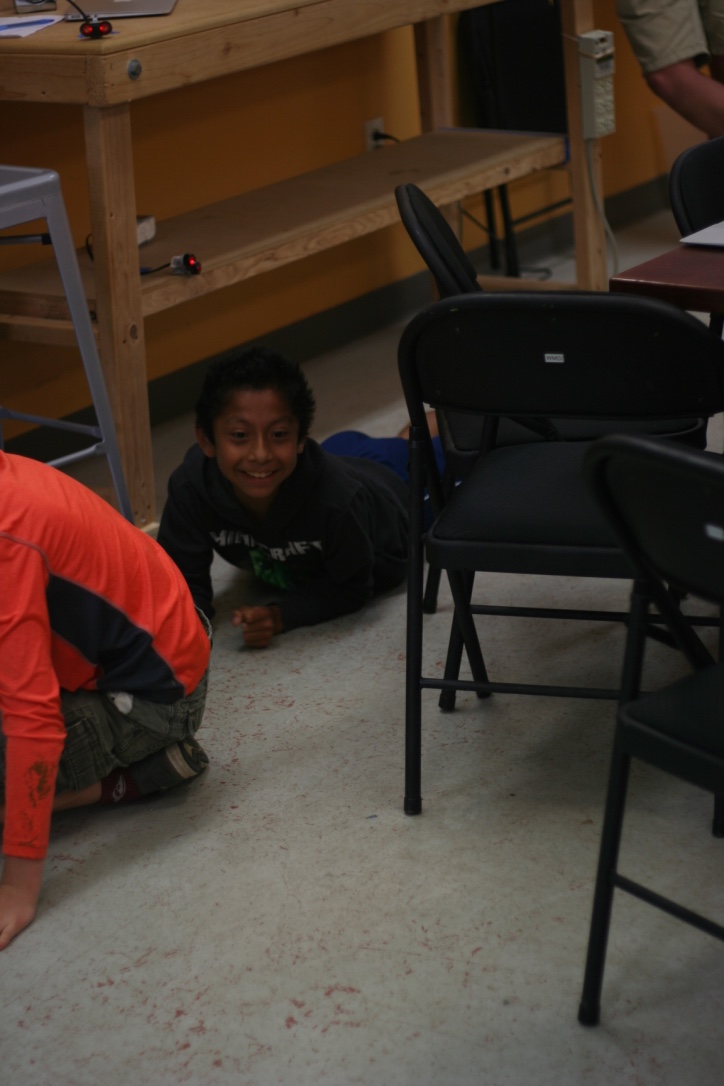
Students were also very excited about artificial intelligence. Coding a robot to sense its environment and make decisions for itself has become a big part of our modern world. Participants got to practice this by coding and designing a motion sensor obstacle course! Each sensor was programmed to make a noise if someone passed too close. Students had the goal of getting through the entire course without triggering a single sensor. To make the game challenging, students popped out rulers, carefully measuring the trigger distance they should code their motion sensors to. Soon, giggles filled the room as participants rolled, jumped, and crawled through a glowing forest of red sensor eyes! Excited high fives broke out amongst the group as we finished the course. 

All in all, the week has gotten off to a fantastic start! We can't wait to see what these robot designers think up next!

Mini Maker Camp Final Days

By Jeremy Knowlton

Mini Maker is finishing up today, putting a wrap on three days of wild creativity and innovation! Participant projects included 3D printer based design, hydraulics and pneumatics, Aeronautical design, Python based coding, and much more!

Participants learned the ins and outs of 3D design. Then they got to watch in fascination as the printer slowly formed the charms that they dreamed up!

Aeronautical design was a highlight, as students built and then added adaptations onto laser cut balsa wood planes. These light flyers are powered by rubber bands, which give the planes enough power to, in some cases, fly over 80 feet and subsequently get stuck on our roof!

Participants spent lots of time making minor adjustments to the wings in an effort to create optimal flight! And of course, we also spent of a bunch of time launching, chasing, and giggling after planes as well. 

Another highlight of the week was our afternoon of computer science! We loaded up one of the cheapest and smallest computers in the world, the Raspberry Pi, and played Minecraft on it! Later, we used a coding language called Python to create massive skyscaper blocks in seconds, huge custom designed castles, and even random block generators that shot out mushrooms, fire, cobblestone, and water melons  as you ran!

a massive LEGO battle with a whiteboard background!

a massive LEGO battle with a whiteboard background!

We wrapped up the last day with an all time student favorite: stop motion animation! Students broke into pairs and took pictures of a scene that was created with LEGOs, a whiteboard, or themselves outside! Participants then made slight changes to their scenes, capturing every change with a picture. At the end, they strung each picture together and created very cool videos! There were huge rollercoaster whiteboard videos, LEGO battles, floating kids, and much more!

One group (above) spent over two hours engrossed in their video, creating a LEGO coaster car that spun around a track while teleporting and getting fired out of cannons! There was also a space ship involved.

Poor Tom was cornered in a Calvin Ball sneak attack

Poor Tom was cornered in a Calvin Ball sneak attack

We ended the camp on a high note with a game called Calvin Ball. Within a boundary, students had to make up one new rule for their game every 30 seconds or so. They got really into the game design process! We ended up with a game where students tried to tag counselors with rubber bands and counselors lightly bopped students on the head with plastic balls. If you were bopped or rubber banded, you were frozen for 5 seconds. There were also safety bases and skipping rules. Loads of chaotic fun! 

We ended the day with some Minecraft group challenges where every student was on the same server creating bases and protecting each other from zombies. tree houses, battle bunkers, and castles were created for safety. All in all the camp was loads of fun for the kids and WMSI staff!

Looking forward to seeing you all next year!!

Game Design Camp Final Days

By Jeremy Knowlton

Gloriously creative final projects have been finished and sad goodbyes have been passed around. Game Design Camp wrapped up on Friday with an amazing showing of creative problem solving, coding, and a good natured goofiness that summed up the entire week. During the week, participants bonded while engaging in outdoor game design, sensor maze building, artificial intelligence design, interactive, electronic board game design, and much more! 

Some students really dug into the idea of level design, creating many-leveled games that tell a story while increasing in difficulty (above). 

Some students used Scratch to design their final game projects. One participant coded herself into a story that involved a multi layered house and a mysterious disappearing sandwich (above and below). 

During camp, we also focused on using simple tools to design outdoor games, focusing on the crux of what makes an outdoor game fun. Students got very creative with blob tag (Below)!

We also built outdoor games using a secret ingredient: paper plates. Students had to somehow design a game that fit these criteria: must be less than 5 minutes; must be contact lite; must involve at least 5 people; must somehow involve paper plates. Students came up with some whacky and inventive ideas (below)!

Designing a game usually involves a huge team of computer scientists, management teams, advertisers, testers, and artists. Several participants at camp got very into art design, creating partnerships where students took turns designing art for games and coding game elements (below). 

An electric, interactive game board. Whenever a game piece hit a game board square, it would complete a circuit, triggering your avatar on the computer to move to a different part of the spaceship. 

An electric, interactive game board. Whenever a game piece hit a game board square, it would complete a circuit, triggering your avatar on the computer to move to a different part of the spaceship. 

All in all, camp involved lots of fun and many giggles (above). 

We hope to see you all at another WMSI program soon!

Game Design Camp Opening Days

By Jeremy Knowlton

Game Design Camp has begun with high creativity, fun, and goofiness - all the things you'd expect from a group of growing game makers! We started the week with a challenge: let's learn the elements that make a good game across multiple platforms, whether that platform be a computer game, an outdoor game, a board game, or even a cell phone app. Participants have risen to that challenge!

Outdoor games!

Outdoor games!

One young designer created a paper hat throwing game with a counselor! Laughter was enjoyed by all.

One young designer created a paper hat throwing game with a counselor! Laughter was enjoyed by all.

Humans have been using games as learning tools for thousands of years. Good games always teach something, so that, as you play, your chances of winning the game become higher. Participants used this idea to design amazing motion sensor mazes (below). Students coded these sensors to have basic artificial intelligence, which allowed them to speak certain phrases or make certain sounds if triggered. Participants used these to create obstacle courses which taught strategy, flexibility, and agility. 

Having fun with sensors!

Having fun with sensors!

The obstacle course!

The obstacle course!

Good games also have good story telling, often unlocked through level-based design. As you unlock each level, you are rewarded with more of the story. Participants have been working on designing level based games using various platforms, including Scratch coding, Game Star Mechanic, and even app making software like Bitsbox! Stories have involved moon colonies, dogs looking for their owners, and even dragons flying through magical kingdoms!

Overall, its been a great start to the week with amazing creativity, group work, coding, laughs, and whacky games.

Looking forward to the rest of the week!


Young Maker Camp Last Days

By Jeremy Knowlton

Young Maker Camp finished up last week, tying a bow on a creative and explorative week! By days' 4 and 5, students knew the room, the counselors, and the tools they had at their disposal, which led to some gloriously whacky and creative projects! 

thumb_IMG_0844_1024.jpg

Participants explored aerodynamics, where they made paper helicopters, fighter airplanes and circles that could be launched above fans in order to test uplift!

We even tested them outside, where we explored whether initial velocity of the human launcher led to faster planes!

thumb_IMG_0863_1024.jpg

Later, we worked on art design within coded games, which led to loads of giggles and fun!

thumb_IMG_8612_1024.jpg

We even spliced our faces onto dragons...

thumb_IMG_8588_1024.jpg

We also took still pictures of LEGOS and whiteboard designs, made small changes, and then took more pictures to create videos of fantastical stories! There were snowboarders doing crazy tricks, sharks eating beneath exploding mountains, and superheroes jumping into cars!

thumb_IMG_8624_1024.jpg

We took story telling a step further by using a green screen to code ourselves into stories! We took pictures in front of the green screen, removed the backgrounds, and then imported ourselves into Scratch Junior (a coding software for kids). Young makers then coded themselves doing a different action, which included jumping, spinning, talking, and even shooting a basketball!

We wrapped up our week of exploration by coding motion sensors in a cool artificial intelligence project. Young Makers coded these sensors to make a sound if triggered. Afterwards, they organized these sensors into a sweet obstacle course. Giggles filled the room as participants went around the course crawling, jumping and meandering away in an effort to avoid the sensors in this full room game!

Overall, it was a fantastic week of creativity. The counselors and I enjoyed every second of watching these Young Makers get excited about creativity through STEM challenges. 

We hope to see you all next year!

Young Maker Camp Day Three!

By Jeremy Knowlton

Throughout the week, we've been getting super excited about making stuff move; we've also been excited about questioning why things move. Today, we cranked our scientist's caps on and observed how things will move through water!

First, we handed out a plate and 10 skittles to each maker. We asked them to arrange the skittles in a fun pattern. Next? the observation challenge! As counselors poured water over each student's skittles, we watched what happened and then performed experiments! Some students didn't touch their plates and observed  how colors diffused across the plate in cool patterns. Other students blew on their plates, gasping as the colors blended into a brown mush before slowly separating back into distinct patterns again. Super cool! We challenged students to think of cool reasons why colors liked to be separate, and received lots of creative answers, including "red and green aren't friends!"


We also added custom modifications to our robot builds today to answer a challenge: "what stuff can your robot haul?" Makers brainstormed and giggled as their newly designed robots moved foam boards, paper towels, and Jeremy's hat!

Folks at WMSI also had to answer a challenge today: "what's a good outdoor game for a STEM Camp?" The answer was gears - lots of colored gears in the best scavenger race our staff has ever thrown! We placed gears all over our green space and had the makers collect them all as quickly as possible. The team work payed off - we collected over 100 gears in 50 seconds! Tomorrow, there will be even more challenges... 

IMG_0822.jpg

At the end of today, we started on our next project: Stop Motion Animation! Can't wait to dive in more tomorrow!

If you'd like to see more pictures, check out our Facebook album of the day!

Young Maker Camp Day One!

By Jeremy Knowlton

Young Maker Camp Day One started with an explosion of creativity!  Students entered the WMSI classroom on Monday with emotions ranging from excited to nervous and shy. Our amazing staff of camp counselors was there to greet them, giving them a fun art challenge: set the room for creativity. A room is just a room until you decorate it. Each participant chose two lasercut cardboard cutouts to start with and created traces on construction paper. Students then added color and taped them to the walls, creating murals where tiny cars were chased by huge cats and trains were becoming fast friends with robots!

thumb_IMG_0753_1024.jpg

Afterwards, we circled up and went over rules and played some ice breakers. Participants were very polite and a little shy. Ice started melting when we introduced our theme for the week: let's make stuff move! First thing to move? cardboard creatures run by pneumatic pumps! (two syringes connected by piping)

Participants designed pants, shirts, arms and shoes for their creatures. Next, they had to make an important decision: what would they animate on their creature? 

thumb_IMG_8447_1024.jpg

The design challenge was on! Participants attached hats, heads, and arms to one syringe. With the other syringe, they could then remotely control a smile, a flying hat, or even an extendable arm. There were even a few launched heads (which went a good 5 feet!) which led to uproarious giggles from everyone! Harnessing the power of air pressure is tons of fun.

After a quick snack, students jumped into another movement system: harnessing motor power to make wiggle bots! Looks of concentration covered faces as pairs attached motors, power sources, and gears to their builds. Next, they taped something light to one side of the gear attached to their motor, which, when revved up, caused an unequal force distribution across the bot, causing it to wiggle across the table! Looks of concentration melted into grins as whacky bots spun their way around the room!

With any great build, there's always an even greater clean-up! We quickly cleaned up the room and briefed everyone on tomorrow's engineering challenges: Build a wigglebot that can draw, and begin to learn how to use code to move robots! Can't wait for tomorrow!

For more pictures, check out our Facebook Page! We posted over 20 photos from the day!

Game Controller Design at Lakeway!

By Jeremy Knowlton

WMSI Mobile has been visiting Lakeway School these past few weeks, bringing challenging and fun design opportunities to excited groups of 4th, 5th and 6th graders! This week, we broke out the fruit and circuit boards in an exciting engineering challenge! The missions? Design a fruit piano, and make your own game controller!

To play the potato, or not the play the potato. That is the question. 

To play the potato, or not the play the potato. That is the question. 

STEM Explorers started the day with a demo: a carrot plugged into some electrical wires. These wires were plugged into a makey makey, which in turn was plugged into a laptop. When a student touched the carrot, the computer played a piano sound. Gasps! What was going on? Somehow the computer knew that students were touching the carrot. We challenged students to be Materials Scientists and test other materials in the room that may cause the computer to play piano notes. 

Carrot Piano!

Carrot Piano!

With grins and giggles students jumped into experimental design, testing carrots, potatoes, scissors, chairs and noses. 

Several oranges were sacrificed in the making of this instrument...

Several oranges were sacrificed in the making of this instrument...

After testing, we asked students, based to make hypotheses based on their observations about what was going on. The consensus was that materials which were even a little bit conductive (things that have metal or electrolytes, usually) completed a circuit and that commanded the computer to play a piano key. Cool science!!

Apparently, noses are very conductive!

Apparently, noses are very conductive!

We then applied this knowledge to the design of video game controllers. We used cardboard, aluminum foil and Scratch games in order to make custom controllers to fit our games! 

That controller was too big, that controller was too small, but this controller is juuuust right!

That controller was too big, that controller was too small, but this controller is juuuust right!

Soon, students were strumming guitars with aluminum strings, playing Whack-a-mole with conductive hammers, and playing Donkey Kong on classic, home-made nintendo controllers!

All in all, an extraordinary show of creativity! We're excited to see what the 6th graders do next week!

Want a fun experience this summer? Join our summer camps! Click here to find out more!

Owls in the Classroom, Pt. 2

By Marc Bucchieri

We left off in part 1 of this blog post after explaining how a team of intrepid STEM explorers at the Woodland school were introduced to the Owls and given the task of creating a game with them. Fast forward two weeks, and our WMSI staff were back at Meadowstone Farm to meet with the Olders again and hash out the details of their awesome interactive game. The students had been given a few constraints to help them narrow down the overwhelming realm of possibilities. Their game was required to be playable in less than 30 minutes, allow for at least three players at a time, use at least two Owls, and have a skill-based component. In order to help them pull these pieces together, they were shown a simple version of the design cycle (also known as the engineering design process).

Now just replace “problem” with “awesome game opportunity”.

Now just replace “problem” with “awesome game opportunity”.

The group met their constraints by developing a set of mini-game stations to be completed by a group (or groups) of players. These stations consisted of: charades, a math race, a field-sized shape-drawing challenge (called GPS Draw), and a codebreaking interactive Owl challenge that we finally dubbed “Flippy Flop”. There was some debate as to whether the game should be more competitive (student teams playing against each other) or collaborative (all students race together against the timer). In the end the group of Olders decided to run it as a collaborative game. Instead of competing against each other, students would complete stations in order to earn the combination to a locked chest containing the timer unit. If they completed all the stations and opened the lock in time, they’d be able to keep the timer from ticking down to zero.

Getting stoked on running and math problems

Getting stoked on running and math problems

After spending their third session hashing out some details and testing the different stations of the game, students were finally ready to roll out their masterpiece for lesson #4. The game begin with a lively test of creative acting: the charades station. Each participant was given a prompt to act out for their peers, and the group quickly charaded their way through a clown, a racecar driver, a policeman, and a painter. Then it was on to a speedy test of their numeric skills: a math race across the farm! The Olders dashed past signs with pieces of a longer math equation (+4… -13… x22…) and then typed their answer into a python code-powered computer terminal.

This little python script checked their math skills at the end of the course

This little python script checked their math skills at the end of the course

After the math race came the GPS draw station, which pushed our Owl tech development in ambitious new directions. The setup for this game station called for half the group to walk one Owl around a field and draw a shape with their path, pushing a button at each new point. Meanwhile, the rest of the group gathered on the edge of the field yelling instructions. To make things interesting the draw group wasn’t allowed to know what shape they were drawing- they could only listen to their teammates directions.  The “home base” Owl received the GPS coordinates of the button presses and drew the shape on the screen.

The toughest obstacle to overcome for this mini-game was the limited accuracy of our GPS boards. On a clear day, each unit can pick up its location within a 33 ft. radius. In order to achieve higher accuracy (e.g. for surveying applications) experienced users implement differential GPS techniques. This means placing one unit at a known, hard-coded location, and then comparing its known location to the location as reported by satellites. This information can then be used to refine the precision of other GPS units in the surrounding area. Sounds simple, right? Unfortunately our GPS units didn’t get the memo that this should work really well, and instead decided to fluctuate wildly with no relation to each other. This resulted in a pretty amusing situation, in which students would attempt to walk a triangle and end with a shape that looks like a bird:

In order to make this station more interactive (and less frustrating) the program was set up so that users could delete crazy points by clicking on them. By the way, all this cool visualization stuff was done with a very neat programming interface called Processing, which is used by data visualizers and artists the world over.

After a lot of shouted direction-giving and stomping around a wet snowy field our heroes were feeling ready for the final station of their game. “Flippy Flop” was inspired by the initial accelerometer demo (the one with the crazy pools of color), which showed how this amazing little chip can be used to sense the orientation of an Owl in space. This led to a game station in which the Owl screen displayed a coded message that students could interpret into one of six directions, coordinating to the six faces of the Owl: left, right, top, bottom, front, or back. When our team finally decoded and re-oriented through the 9 step process they received the final combination to the lock!

This coded message translates to "Left", or put the left side down.

This coded message translates to "Left", or put the left side down.

Once the Olders had stormed back inside to unlock the treasure chest, they were faced with one more surprise challenge to disarm the ticking timer. Out of the Owl’s enclosure poked two loops of wire: one red and one blue. With the final seconds slipping away, the students had to pick which of the two wires to pull. One would stop the timer, while the other caused it to count down three times as fast! (Hint: always pull the blue wire). Fortunately, this group of STEM adventurers was as lucky as they were resourceful and successfully ended the game with a pent-up sigh of relief. Not only did they all get to win the game they had designed, but they met and surpassed the constraints we had set out for them: their final product was skill-based, involved the Owls, took about 25 minutes to play, and could enjoyably be played by at least 5 people (and probably many more). Yay for playing with technology outside!

Compost Sensor Development

By WIll Norton

Here’s the dream behind this project: Have a wireless temperature logger that can be placed in a compost pile, whether it be a classic home compost pile, a large industrial or agricultural compost pile, or possibly a rotating compost tumbler. Such a sensor set up could be a useful tool in a classroom to integrate practical everyday applications to data lessons, or be useful to improving personal or school composting systems.

Someone out in the vast world of the internet may sell exactly this, but it probably isn’t affordable for these home and classroom applications. So we turn to the resources we have close at hand at WMSI: a Walmart and a 3D printer, to try to make our own custom design. We found a $10 wireless indoor/outdoor thermometer at Walmart to do our temperature sensing.


Unfortunately the housing for the sensor we want to put in the compost has nothing resembling water-proofing, so the design work starts with building a new compost-proof case for the temperature sensor that others can easily recreate with a 3D printer and other common inexpensive materials.  

So far I’ve designed a couple of different prototypes for this sensor case.

Prototype I

Prototype I

Prototype II

Prototype II

Three problems with the first Prototype that I found were:

  • The case does not have a strong enough attachment point between the top and bottom to stay together

  • There was no way to attach the case to anything, in order to later retrieve it from compost

  • The sensor had a dramatically slower response to temperature in Prototype I than in other close-at-hand containers such as a Tupperware container or Ziploc bag, as shown in Fig. 1

To address the first two problems, I added larger ridges around the top of the main case, larger grooves in the lid and a loop to tie a retrieval string to. I also left an open space for a metal junction box cover I found at a hardware store, hoping to give the case a side that would conduct temperature changes to the sensor better than the plain plastic case. The results from this test are shown in Fig. 2. As it turned out, the metal cover did not make a significant difference in the responsiveness of the case, so it is probably a feature I can leave out in future redesigns to simplify the construction.

This case also needs to be waterproof in order to avoid having gross compost juices leak onto the temperature sensor and ruin it. I tested the second prototype for waterproofing in three ways to see where, if anywhere, it would leak:

  • I placed it open on a paper towel and filled each half of the case with water

  • I placed a paper towel into the case and closed it and floated it in a bowl of water

  • I filled the case with water and closed it and rolled it around to see where water came out

The result in all three experiments was:

Clearly waterproofing is something that needs more work. The largest leak by far seemed to be the connection between the plastic lid and the base, but water also leaked through the seemingly solid plastic of the case. Some solutions to explore in the future include different types of plastic for the printer, coating that would waterproof the plastic, and some sort of gasket for the meeting of the two plastic pieces.

Not to be outdone by a small flood of water leaking into my case, I put the sensor in a plastic freezer bag and put the setup in my home compost pile to get some temperature data and see if the sensor could broadcast through a pile of rotting food. The results are in the below table and Fig. 3.

*Other thermometers showed significantly lower temperatures.

*Other thermometers showed significantly lower temperatures.

The data shows a slight downward trend in the compost temperature as the weather got colder over the 6 days I collected data. However, more interesting than the actual numbers are two limitations of our sensor that I found. First of all, the indoor temperature sensor on the unit with the display which I used to measure the outdoor temperature seems unable to read below 32 degrees, since according to other thermometers the temperature was well below 32 after the seventh reading on the afternoon of March 3rd. The second limitation is that about half the time when I went to collect data, the display had lost wireless contact with the thermometer and had to be reset by removing and reinserting the battery, and in one instance was unable to reestablish contact for several minutes before I had to leave. It’s unclear what caused the loss of contact; possibilities include the compost interfering with the signal, or cold temperatures decreasing the charge of the batteries.

The takeaway from this experiment is that it is indeed possible to make a functional compost-proof case for a wireless thermometer for a small compost pile using 3D printing and easily available supplies. This setup worked just well enough for this simple experiment, but the unreliability of the signal would make it unhelpful in any sort of data logging setup. The case has some flaws such as not being waterproof on its own, and having a flimsy recovery system that wouldn’t help in a larger compost pile such as on a farm. With more redesign and research, these design obstacles may be overcome, and with more experimentation the cause for the signal loss could be isolated and removed if the cause is not the dense compost interfering with the signal.  If, however, the signal loss is caused by the compost, that may become an insurmountable obstacle.


Mobile STEM: Game Design!

By Jeremy Knowlton

WMSI Mobile STEM Lab Explorers have begun their final projects of the year. Using the knowledge they've accumulated from previous sessions, they've been challenged with one of our most open-ended and exciting prompts yet! The task is for students to design their own games using Scratch coding, LEGO Robotics, paper circuitssensors, and Makey Makeys. Games are great, having been used for thousands of years to teach valuable skills, such as speed, eye-hand coordination, reading, and math in an engaging way. What makes this challenge unique is that students are given a very interesting constraint - the game must be part electronic and part physical. Cool! 

Students began by getting together in groups and brainstorming. They then answered several important questions to frame their game. All good games teach something, so that as you practice the game you increase your chances of winning. What would their game teach? They also asked the important question, "what technology will we use in our game?" We originally were worried about students not having enough direction in this extremely open-ended prompt, but STEM Explorers took off with the challenge, grabbing cardboard, scissors, tin foil, wires, and robotics kits to begin their designs!

Explorers endearingly named this game board "The Octopus".

Explorers endearingly named this game board "The Octopus".

Every project involved coding. Some groups in Milan designed and coded board games that had conductive tiles you could land on. Every time a game piece landed on that tile, it triggered the computer code to randomly draw a riddle or challenge that they had to accomplish to move on!

One group in Lancaster designed a pattern game (below) with copper tape, a red LED, and a yellow LED. You spin the wheel to get a random color pattern you need to complete, such as "red red, yellow, red, yellow yellow." You then have 10 seconds to correctly light up the LEDs in the correct pattern to move onto the next challenge!

thumb_IMG_8372_1024.jpg

The group below designed a board game with different colored tiles. Each color was a different kind of challenge. For example, if you landed on red, you had to throw a conductive ball at a target. If you hit the target, it completed a circuit and prompted the computer code to start cheering! So cool!

One student (below) even designed a board game that used a conductive button and a random number generator to perform an electronic dice roll for his game!

All in all, students of the North Country again demonstrated their amazing creativity and problem solving skills, and along the way had many grins, laughs, and goofy jokes. Looking forward to see what the STEM Explorers do next week!


Owls in the Classroom, Part 1

By Marc Bucchieri

It’s been awhile since our homebrewed Owl units were first introduced to this blog, and they’ve come a long way since then. In fact, the Owls just celebrated a major milestone in their fledgling career in the WMSI tech arsenal. Over the past month, the Owls were incorporated into a unit of lessons for the Woodland Community School at Meadowstone Farm. Tech development was pushed forward, games were designed, and ominous timer displays ticked (almost) down to zero.

Which wire to cut?!?!?

Which wire to cut?!?!?

It all started when our Mobile and Instructor-Developer Corps coordinators made their way down to Meadowstone Farm one rainy morning to play a game with the Older students at the Woodland School. This was to be the first lesson of a four-part curriculum, and the game was intended to demonstrate the technological capabilities of our Owl units. After a quick tutorial on map and compass skills (you’ll see why in a second) the students were given their Owls and a sheet of coded clues. The clues, once decoded, hinted at different locations around the farm. Students then raced to each waypoint, where their GPS-enabled Owl released a compass bearing toward the final treasure. Once several bearings were plotted, the teams could begin to home in on their goal.

Students were given these coded hints to help them find the waypoints.

Students were given these coded hints to help them find the waypoints.

In order for this game to work, the Owls were enabled with several tech features that have been in the works for months. In order to release bearings at all the right waypoints around the farm, each “seeking” Owl had to be hardcoded with the coordinates of each waypoint and its location relative to the “hiding” Owl. In future iterations these bearings will be calculated in real time, allowing the hidden Owl to be anywhere within the circle of waypoints. The Owls were also equipped with two-way radio communication, so that the hidden unit could send time updates to the seekers.

Student maps looked sort of like this, if a bit more rain-smudged and gray

Student maps looked sort of like this, if a bit more rain-smudged and gray

After successfully finding the hidden Owl (in a silo) the group returned to the classroom to brainstorm and design a game of their own. Back inside they were introduced to some other hidden capabilities of the technology, including the ability to read and transmit sensor data. Students watched in excitement as the readout from an accelerometer was displayed as shifting pools of color, then took turns moving and shaking the Owl to generate their own colorful patterns.

Our WMSI staff and students narrowly escaped without.. being.... hypnotized

Our WMSI staff and students narrowly escaped without.. being.... hypnotized

Over the next couple sessions, Woodland students went through several iterations of planning, refinement, and testing to bring together an awesome collaborative game. As with most feats of engineering, this game was designed to fit a set of constraints. The game must allow for at least three players at a time (ideally six), take less than 30 minutes to run, and use at least two Owls. Most importantly the game should be skill-based, so that participants can improve the more they play it. Check back soon for the story of how math, silly acting, and GPS were all used to create a board game the size of a farm.

Mobile STEM: Power of Code pt. 1

|  By Jeremy Knowlton

WMSI Mobile has been busy with STEM Explorers these past few weeks. We've now been facing exciting challenges involving computers. Most computers these days can do amazing things; however, these computers are usually "un-tinkerable". Users aren't supposed to open them or play around with the code that makes them work. Using Raspberry Pi, an extremely cheap, open-source computer, STEM Explorers have been able look at what a computer really is. Not only that, but we've also been able to look at some of the text-based code that helps run our world!

The Raspberry Pi, a $40 "handheld" computer

The Raspberry Pi, a $40 "handheld" computer

The first challenge was to put the computer together by following a diagram, a challenge considering most household computing devices these days are phones and laptops. We then tasked them with a challenge: "find Minecraft on your Pi". Explorers searched away with a gleam in their eyes. Minecraft is, quite simply, the best. On one hand, It is a game of almost pure creativity.  With building blocks from a rich inventory of materials, players can make anything from a cabin to a mansion to abstract art.

Soon every Pi had miners and builders exploring new places and worlds. Now was the time to unleash the power of coding. Explorers pulled up a program called Python, which is a very powerful text-based coding program. Next, they ran an example program called Megablock.

Gorham students generating a massive hollow block made of TNT. Giggles erupted as they set the TNT off and maxed out their computer's CPU

Gorham students generating a massive hollow block made of TNT. Giggles erupted as they set the TNT off and maxed out their computer's CPU

With the magical press of a button (F5), a towering block of lava appeared on their Minecraft screen. No way! A towering block of lava is great, but students quickly saw the value of making cities and mazes using this program. They edited the python code, making diamond, TNT, dirt, and obsidian megablocks of various sizes. Creativity in coding spread like wildfire across the room!

The Megablock python code. Everything in red is instructions for the Explorers

The Megablock python code. Everything in red is instructions for the Explorers

After students made 3 megablocks, they got to unlock a new Python program: CastleBuilder. Explorers opened the new program and read through the code. Students then took their code knowledge a step further. They edited the x, y, and z coordinates to change the size of the castle and also changed their water moat into lava. They hit F5. A towering stone structure with battlements, windows, and a moat appeared on their screens. Looks of concentration turned to grins as students explored their new castles, adding beds, windows, libraries, and crafting rooms. What would have taken two+ hours manually was completed in seconds using programming. Coding is so cool!

Collaborating over some parkour courses!

Collaborating over some parkour courses!

Here at WMSI, we want to turn coding into something less scary sounding. We firmly believe that anyone can learn to code if they are given small, fun, and achievable steps which progress from simple to complex (sort of like playing a level-based game!). Rather than asking students to write computer programs from scratch, we ask that they read the code, understand it, and edit it to make it their own. At the end of this process, they are rewarded with something cool like a Minecraft castle, which spurs on future coding interest! 

Next time: how can we create a mini game in Minecraft using loops, random number generators, and megablocks? Stay tuned!


February Vacation Camps 2017!

By Jeremy Knowlton

After a brief hiatus, WMSI Workshops were up and running again last week with three days of challenges, laughs, and adventures! 

We kicked off vacation workshops with an interesting blend of robotics and crafts. the challenge? Build a you-sized, pet-sized, or me-sized robot using cardboard and LEGO Mindstorm robotics kits. Students went a bunch of different ways with this, building sharks, trams, ocean waves, and race cars. 

Meanwhile, other students took recycle art to the next level by putting markers and a motor on their favorite carton or tin can. Next, they powered up the motor, which spun around an uneven weight and caused the "squiggle bot" to zoom around, drawing all sorts of sweet designs. 

Participants challenged themselves in a whole different way the next day. As students filed into the WREN classroom, they were greeted with a lineup of fruits and vegetables. Their first challenge was to find conductive materials (such as a sweet potato) and make a functioning electrical piano using these materials as buttons. Giggles filled the room during this experimentation as participants set up bananas, apples, and scissors to act as piano keys. Students then took what they just learned and used that knowledge to design fully functioning game controllers!

After designing a Mario controller, these students decided to hack the code and make Mario fly!

After designing a Mario controller, these students decided to hack the code and make Mario fly!

A very cool Nintendo classic game controller design!

A very cool Nintendo classic game controller design!

Our last day came with a buzz of excitement and snippets of tech savvy conversation bouncing around. Words like "mods", "redstone", and "monster generators" were common. We've learned that there are few things more exciting in this world than playing a multiplayer game of Minecraft with 10 of your friends right beside you. Each student logged onto a laptop and had a 15 minute warm up on an obstacle based world. After that, game faces were on. The STEM challenge? You have a village at the base of a volcano. You have 25 minutes to prepare your homes before two volcanoes explode and pour lava down towards your home. The noise level rose dramatically as students zoned in and teamed up to take on this real world challenge. Some groups prepared walls. Others took apart their homes, put those parts in a chest, and hid that chest far away from town! One group even crafted and prepared a water dispenser on top of their house, hypothesizing that lava, when mixed with water, would turn to obsidian before it affected their homes. 

Brainstorming to solve challenges. 

Brainstorming to solve challenges. 

Crafting to survive. 

Crafting to survive. 

The challenge was a fantastic success, with all homes surviving and participants happy with their designs. Later, we finished up with some survival mode challenges where students worked together to craft what they needed to survive mobs of monsters. 

Thanks to parents, participants, and leaders for making our workshops awesome!

We hope to see you at our April and summer vacation camps soon!

Mobile STEM: What Makes a good STEM Lesson? Part 1

By Jeremy Knowlton

WMSI Mobile has been busy this month - we visited 8 different schools in the North Country!

Each route color represents a school we've visited once or multiple times in the past month. 

Each route color represents a school we've visited once or multiple times in the past month. 

While adding many miles to our new van, we've been getting students excited about some seriously cool new STEM skills, including sensor programming, game controller design, and Minecraft coding on one of the world's smallest and cheapest computers!

During these hectic weeks of engineering and fun, we've been asking ourselves "what are the fundamental components to a good STEM session?" Here's the first idea we came up with. 

Every set of hands needs something to do. One of the many reasons students loved game controller design was that there was something for each partner. For example, a set of Milan explorers had the unique idea of developing a classic joystick controller. One partner built the box for it while the other partner built the handle. They worked furiously to get it done on time. You could hear fast paced discussions of measurements and placement of aluminum foil as they cut, taped and thought their creation together. 

One student (left) working on the handle of the joystick, while his partner works on the box to contain it. 

One student (left) working on the handle of the joystick, while his partner works on the box to contain it. 

Another pair designed a controller for a three person game. Each player had an aluminum foil "thimble" around their index finger which, when placed on a conductive pad, made Donkey Kong do something in-game. One player controlled jumping while the other two controlled backwards and forwards. Let me tell you, the team work required for coordinating barrel jumps and avoiding bad guys is pretty amazing!

IMG_8112.JPG

All of these ideas easily incorporate two sets of hands in each partnership, whether the jobs be cutting cardboard, coding, taping, or the act of playing the game itself!

Not all of our activities followed this principle of "every set of hands needs something to do". Some of our activities needed a little polishing before they became rockstar STEM sessions. Our third session, musical robots, involved coding EV3s so that different colors placed under a sensor would trigger the EV3 to make different sounds. This activity had a lot of promise but was missing some crucial WMSIcal and STEM design touches. Namely, it was all coding, which meant that only one set of hands was busy in each pair. Many partners contributed ideas, and there was always a keyboard switch every few minutes, but the sharing of the keyboard led to some less than interested STEM Explorers at times.

Creating WMSI activities, like any creative task, follows the design process. We identified a problem -- all hands need something meaningful to do -- and tried several different ideas to fix it. The final concept was pretty awesome. "Musical Robots" became "Sound Bots" and the challenge changed from "design a musical instrument" to "design a motion sensor that does something cool and/or useful." Both involve coding computers to create an output given a certain sensory input, but sound bots is far more engaging.  Sound bots invite team members to design and build structures, mechanisms, and code.  This gives all hands something meaningful to do!

Students suddenly had so many things to do! The room buzzed with activities as pairs coded their sensors, recorded sounds that would be activated by motion, and designed cardboard cutouts that incorporated their sensor!

One pair programmed and designed a panda that told you its name and favorite pastimes if you got close enough to the sensor. 

This group designed a girl robot that greeted you if triggered. 

We even had some door triggered sensors that welcomed you to Groveton every time you walked through a doorway and a birthday cake that sang "happy birthday" every time your head came up close to blow out the candles!

Indeed, STEM learning tools are powerful partly because it is highly engaging, both physically and mentally. We've learned that activities which include a variety of tasks (coding, crafting, wiring, etc.) work best for our STEM Explorers. Using these learning experiences, we will continue to hone our STEM adventures throughout the year!

Next up, we'll use Minecraft to teach coding, engineering, and problem solving!

Mobile STEM: Electrical Art!

WMSI Mobile Lab had some electricity in the Lancaster classroom this week! Literally. Now that we've played around with programming robots, we're zooming into the computer by looking at the circuits which make electronics possible! Most students in the room had never worked with electricity before. They were skeptical; nervous - "can you really make art using electricity?" The youth leaders and I reassured them - no chance of electrical shock, we're going to learn the basics you'd need to make your own electrical equipment, and we're going to make art! First prompt? Build an electrical circuit on paper using copper tape. attach LEDs so that light shines onto the other side of the paper. Next, draw art around the light - what's the coolest art you can make that incorporates an LED?

Students took off with the challenge!

One student quickly discovering the most simple circuit

One student quickly discovering the most simple circuit

We began by discussing circuits and how charged stuff moves through certain materials. We then discussed conductivity. Students, without prompting, immediately tested the most basic circuit: an LED with a watch battery between both leads! (above). The basics were in place and the challenge was on! students grabbed rolls of copper tape and started making! (below)

Digging into possibly the messiest art supply since glue: the copper tape. 

Digging into possibly the messiest art supply since glue: the copper tape. 

Students quickly made functioning circuits with a + end, - end, and an LED taped onto the conductive side of the tape. They next dealt with the big creativity piece: what drawings look cool with LEDs? Students created houses, reindeer, police cars, and many other cool designs!

One student proud of her drawing

One student proud of her drawing

Rudolph himself never shined this brightly!

Rudolph himself never shined this brightly!

Next challenge: how can we get multiple LEDs to work at the same time in an art project? The big thing here is that we can't just put one LED in after another. Circuits work a little like baseball playoffs. In the world series, playing 4 to 7 games in a row is exhausting - you have less potential energy in game six than you would in game one. It's the same with putting LEDs in series, one after the other. The sixth LED won't have enough potential energy (voltage) to light up; however, if you have 4 teams that play two games at the same time (in parallel), all 4 teams will have the same level of potential energy (because each player only plays one game). Thus, if you put LEDs in parallel (each light has a different path back to the battery), each LED will be able to light up. 

A parallel circuit: Each LED is like a baseball game. Charged particles are the players. Any one charged particle only has to go through one LED to finish the circuit

A parallel circuit: Each LED is like a baseball game. Charged particles are the players. Any one charged particle only has to go through one LED to finish the circuit

Understanding lit up students faces as they tinkered around and figured out the parallel circuit. Explorers drew multistory houses, light bulbs incorporating several LEDs, and their names with the I's dotted with LEDs. 

One STEM Explorer quickly discovering the secrets of the parallel circuit!

One STEM Explorer quickly discovering the secrets of the parallel circuit!

One student even developed a switch in his circuit that allowed his police car's lights to blink!

Mrs. K, an outstanding Lancaster teacher and our Onsite Coordinator for the school, has done some cool projects making stained glass using copper tape. She had a lot of useful tips to share with students (below).

Mrs. K helping students diagram their electrical circuit!

Mrs. K helping students diagram their electrical circuit!

We ended on a high note as Explorers excitedly pulled their parents into class to show them their creations! Next session's challenge? Let's test out conductivity by making keyboards out of fruit!

More soon!