Mobile STEM: What Makes a good STEM Lesson? Part 1

By Jeremy Knowlton

WMSI Mobile has been busy this month - we visited 8 different schools in the North Country!

Each route color represents a school we've visited once or multiple times in the past month. 

Each route color represents a school we've visited once or multiple times in the past month. 

While adding many miles to our new van, we've been getting students excited about some seriously cool new STEM skills, including sensor programming, game controller design, and Minecraft coding on one of the world's smallest and cheapest computers!

During these hectic weeks of engineering and fun, we've been asking ourselves "what are the fundamental components to a good STEM session?" Here's the first idea we came up with. 

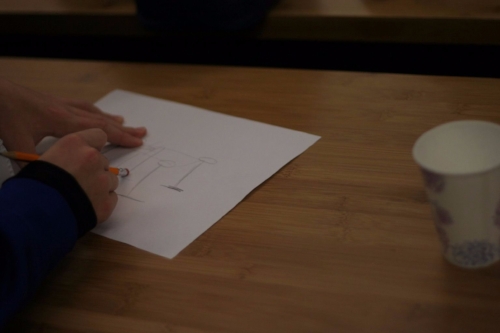
Every set of hands needs something to do. One of the many reasons students loved game controller design was that there was something for each partner. For example, a set of Milan explorers had the unique idea of developing a classic joystick controller. One partner built the box for it while the other partner built the handle. They worked furiously to get it done on time. You could hear fast paced discussions of measurements and placement of aluminum foil as they cut, taped and thought their creation together. 

One student (left) working on the handle of the joystick, while his partner works on the box to contain it. 

One student (left) working on the handle of the joystick, while his partner works on the box to contain it. 

Another pair designed a controller for a three person game. Each player had an aluminum foil "thimble" around their index finger which, when placed on a conductive pad, made Donkey Kong do something in-game. One player controlled jumping while the other two controlled backwards and forwards. Let me tell you, the team work required for coordinating barrel jumps and avoiding bad guys is pretty amazing!

IMG_8112.JPG

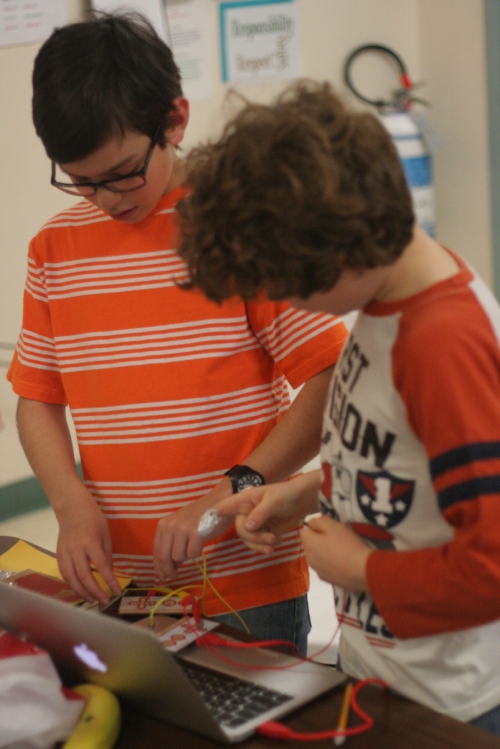
All of these ideas easily incorporate two sets of hands in each partnership, whether the jobs be cutting cardboard, coding, taping, or the act of playing the game itself!

Not all of our activities followed this principle of "every set of hands needs something to do". Some of our activities needed a little polishing before they became rockstar STEM sessions. Our third session, musical robots, involved coding EV3s so that different colors placed under a sensor would trigger the EV3 to make different sounds. This activity had a lot of promise but was missing some crucial WMSIcal and STEM design touches. Namely, it was all coding, which meant that only one set of hands was busy in each pair. Many partners contributed ideas, and there was always a keyboard switch every few minutes, but the sharing of the keyboard led to some less than interested STEM Explorers at times.

Creating WMSI activities, like any creative task, follows the design process. We identified a problem -- all hands need something meaningful to do -- and tried several different ideas to fix it. The final concept was pretty awesome. "Musical Robots" became "Sound Bots" and the challenge changed from "design a musical instrument" to "design a motion sensor that does something cool and/or useful." Both involve coding computers to create an output given a certain sensory input, but sound bots is far more engaging.  Sound bots invite team members to design and build structures, mechanisms, and code.  This gives all hands something meaningful to do!

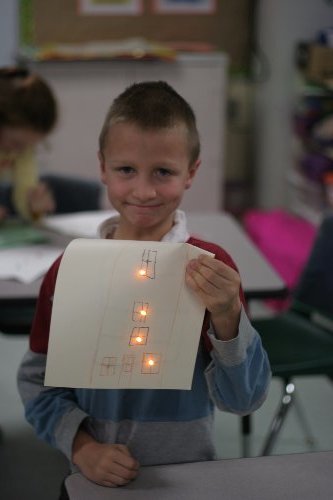
Students suddenly had so many things to do! The room buzzed with activities as pairs coded their sensors, recorded sounds that would be activated by motion, and designed cardboard cutouts that incorporated their sensor!

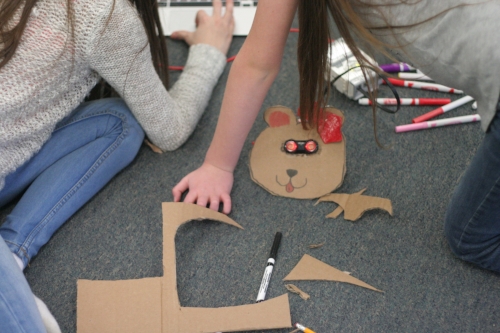
One pair programmed and designed a panda that told you its name and favorite pastimes if you got close enough to the sensor. 

This group designed a girl robot that greeted you if triggered. 

We even had some door triggered sensors that welcomed you to Groveton every time you walked through a doorway and a birthday cake that sang "happy birthday" every time your head came up close to blow out the candles!

Indeed, STEM learning tools are powerful partly because it is highly engaging, both physically and mentally. We've learned that activities which include a variety of tasks (coding, crafting, wiring, etc.) work best for our STEM Explorers. Using these learning experiences, we will continue to hone our STEM adventures throughout the year!

Next up, we'll use Minecraft to teach coding, engineering, and problem solving!

Mobile STEM: Electrical Art!

WMSI Mobile Lab had some electricity in the Lancaster classroom this week! Literally. Now that we've played around with programming robots, we're zooming into the computer by looking at the circuits which make electronics possible! Most students in the room had never worked with electricity before. They were skeptical; nervous - "can you really make art using electricity?" The youth leaders and I reassured them - no chance of electrical shock, we're going to learn the basics you'd need to make your own electrical equipment, and we're going to make art! First prompt? Build an electrical circuit on paper using copper tape. attach LEDs so that light shines onto the other side of the paper. Next, draw art around the light - what's the coolest art you can make that incorporates an LED?

Students took off with the challenge!

One student quickly discovering the most simple circuit

One student quickly discovering the most simple circuit

We began by discussing circuits and how charged stuff moves through certain materials. We then discussed conductivity. Students, without prompting, immediately tested the most basic circuit: an LED with a watch battery between both leads! (above). The basics were in place and the challenge was on! students grabbed rolls of copper tape and started making! (below)

Digging into possibly the messiest art supply since glue: the copper tape. 

Digging into possibly the messiest art supply since glue: the copper tape. 

Students quickly made functioning circuits with a + end, - end, and an LED taped onto the conductive side of the tape. They next dealt with the big creativity piece: what drawings look cool with LEDs? Students created houses, reindeer, police cars, and many other cool designs!

One student proud of her drawing

One student proud of her drawing

Rudolph himself never shined this brightly!

Rudolph himself never shined this brightly!

Next challenge: how can we get multiple LEDs to work at the same time in an art project? The big thing here is that we can't just put one LED in after another. Circuits work a little like baseball playoffs. In the world series, playing 4 to 7 games in a row is exhausting - you have less potential energy in game six than you would in game one. It's the same with putting LEDs in series, one after the other. The sixth LED won't have enough potential energy (voltage) to light up; however, if you have 4 teams that play two games at the same time (in parallel), all 4 teams will have the same level of potential energy (because each player only plays one game). Thus, if you put LEDs in parallel (each light has a different path back to the battery), each LED will be able to light up. 

A parallel circuit: Each LED is like a baseball game. Charged particles are the players. Any one charged particle only has to go through one LED to finish the circuit

A parallel circuit: Each LED is like a baseball game. Charged particles are the players. Any one charged particle only has to go through one LED to finish the circuit

Understanding lit up students faces as they tinkered around and figured out the parallel circuit. Explorers drew multistory houses, light bulbs incorporating several LEDs, and their names with the I's dotted with LEDs. 

One STEM Explorer quickly discovering the secrets of the parallel circuit!

One STEM Explorer quickly discovering the secrets of the parallel circuit!

One student even developed a switch in his circuit that allowed his police car's lights to blink!

Mrs. K, an outstanding Lancaster teacher and our Onsite Coordinator for the school, has done some cool projects making stained glass using copper tape. She had a lot of useful tips to share with students (below).

Mrs. K helping students diagram their electrical circuit!

Mrs. K helping students diagram their electrical circuit!

We ended on a high note as Explorers excitedly pulled their parents into class to show them their creations! Next session's challenge? Let's test out conductivity by making keyboards out of fruit!

More soon!


Learning driven by student curiosity with WMSI Mobile

WMSI is back from holiday break filled with excitement about programs for 2017! Specifically, I've been putting thought into how our sessions work. Should they follow a rigid plan? Should they be flexible, allowing students to drive learning forward through creativity? Both approaches have their merits, but if you have a truly engaging learning tool, letting student creativity power progress can lead to loads of fun!

During our musical robots sessions, students did just that! We started by explaining the engaging tool: a LEGO EV3 computer with a distance sensor and a color sensor attached. On our laptops, we had software in which we could code different sounds to different colors or distances. The framework was set. what could students do with it? 

Students brainstorming with one of our outstanding youth leaders!

Students brainstorming with one of our outstanding youth leaders!

Students started with a fairly easy challenge: program the distance sensor so that volume is related to distance measured. STEM Explorers took off with this prompt, creating police siren like calls as well as howling dogs that increased or decreased in volume. One pair danced in front of the sensor, causing the computer to produce different sounds depending on how far away they were!

Messing with the coding for the distance sensor

Messing with the coding for the distance sensor

The big design challenge of the day? Use the color sensor to produce something fun. Students drew information from their previous, more structured challenges to follow their curiosity with this open-ended prompt. Some students "attached" a word to each colored block, so that when they flashed red under the sensor the output said "Luuuke." they pushed the red away and inserted green - "I am". Lastly, they used blue - "your father". Movie quotes filled the room with giggles. 

A STEM Explorer adding a custom sound.

A STEM Explorer adding a custom sound.

A couple sets of students used the custom sound recorder on the LEGO software to record random words. They then coded the words to different colors, which allowed them to make random sentences. They called it "The Mad Lib Generator". This gave me an idea. I talked to the students some more about their generator and decided to act on the idea. With the help of Bill and our youth leaders, I created a madlib LEGO program that would draw from a random bank of nouns, verbs, or adjectives depending on which color was under the sensor. 

This code generates a random number. The number range it can generate depends on what color is under the sensor. A random number triggered by the red block will choose one of three nouns added by students. 

This code generates a random number. The number range it can generate depends on what color is under the sensor. A random number triggered by the red block will choose one of three nouns added by students. 

for our next music bots session some students got to beta test the program, adding their custom nouns, adjectives, and verbs into the word banks. They read a Mad lib that I printed and used the program to fill in the blanks. Not only did they love the program, but it also gave them the chance to explore random number generators and variables in the LEGO code! This novel idea would not have been possible without STEM Explorers driving the creativity of our Mobile Lab sessions.

Some students having a blast with mad libs!

Some students having a blast with mad libs!

Next, electricity!

Gorham Kids Excited About STEM!

Our goal for WMSI Mobile STEM Lab is to excite kids about creative problem solving through STEM curriculum. As a new program, however, we weren't sure exactly how kids would react to our sessions. Would they be exhausted after a full day of school? Ready to go home? 

Our fears were unfounded. I pulled up to Mrs. Corrigan's STEM Lab at Gorham High School at 2:50PM and was promptly greeted by 6th graders waiting to carry the gadgets for our session inside. They excitedly greeted me by name and asked the most important question of the day: "what are we building this time??" 

We started our session with the usual question. "What creative things have you designed this week?" Ten hands shot up. Our STEM Explorer kids are into tinkering. I told them about the challenge for the day (building a robot that moves without wheels). They were stoked. I then told them about something to consider: "how do we make sure our robot leg thingies grip the floor enough to move?" FRICTION! How do we increase friction? This can be answered with a simple equation:

Friction = (stickiness of foot thingy on floor) x (weight of the object)

I asked the class what designs they could use to increase friction.

"rubber feet!"

"heavy as a dinosaur!"

"put the robot on carpet!"

Physics was relevant over the next hour and a half as STEM explorers dove into the design with smiles. We started with a partner brainstorm session. Students drew out their proposed designs, followed by grabbing the LEGO pieces necessary to build their creature. 

I loved these STEM Explorers' approach to the engineering design challenge. Pairs of students found the simplest way to achieve the build first; then they found flaws with that build; finally, they changed the design to solve those problems. 

The young tinkerers collaborating on their first design.

The young tinkerers collaborating on their first design.

A page from one student's WMSI journal: the first doodle box (above) shows the first build version. The second version shows a weighted motor. Also, the EV3 being dragged along now has wheels!

A page from one student's WMSI journal: the first doodle box (above) shows the first build version. The second version shows a weighted motor. Also, the EV3 being dragged along now has wheels!

Several groups of students had good movement designs but their builds wouldn't move forward because they lacked the necessary friction. We dusted off the friction equation. Students used a mix of "adding mass" techniques as well as rubber LEGO pieces to increase friction. Some even decreased the friction of the EV3 controller their motors were pulling! (above). Robots began to move, dance, and jump across the floor! Thanks, physics!

Of course, with any science or engineering task, not all great ideas immediately work. One group (below) had an innovative four-legged creature built and programmed, a challenge considering the fact that each leg had a motor to be coded to work in synchronized movement; however, their build did not have enough support and quickly fell apart. For their hard work, they won the Penguin Award - a 3D printed penguin that symbolizes daring ideas. When penguins are on an ice sheet and need to get back in the water, one brave penguin needs to enter the water first to make sure their are no seals stalking below. The two daring penguins braved the cold water of new ideas and will have that design figured out soon!

Of course, it wouldn't be a WMSI STEM Lab without our Youth Leaders adding amazing teaching support as well as some cool designs of their own! (below).


We finished the session with an all out robot dance party! A couple students even added some dance moves of their own.


Still glowing from with the pride of a build well done, I told the STEM Explorers about our next session: "Robots that use sensors to make music."

"No way!"

More soon!


Dancing Robots with WMSI Mobile STEM Lab

STEM Explorers have hit the gas pedal on creative design this week! The WMSI Mobile unit recently visited Berlin and Whitefield, bringing a simple free build prompt to students: build a robot that moves without using wheels. Some thought it couldn’t be done, but students outdid themselves in another week of fantastic creative problem solving!

One amazing part of Mobile STEM Lab is that we get to see how different groups of students handle the same problem, highlighting the old saying, "there are many paths to achieve the same goal." Many Berlin students took off with our challenge by modeling their robot after an animal's movement system. One group focused on how a spider moves, with several long spindly legs. Somehow, in a 50 minute period, they incorporated 4 motors into their design, coded them, and had the device dancing around the table! (below).

Another group discussed making a sloth, but there was a design challenge here: a sloth's flexible arms and legs are hard to copy using LEGO parts. The pair worked fast, and had a prototype up and running in no time! however, when they coded the robot to move, they realized something strange:

"it moves more like an inch worm than a sloth!"

"No way - that's so cool!"

the "sloth" ended up having a movement system that looked similar to train gearing, giving it an inch worm like movement.

the "sloth" ended up having a movement system that looked similar to train gearing, giving it an inch worm like movement.

Of course, the Youth Leaders had a blast too, not just giving the students great advice but also doing a build of their own!

the Youth Leaders showing off their design skills!

the Youth Leaders showing off their design skills!

In Whitefield, students took an entirely different approach. they wanted to make a robot fly like a bird! We discussed the power to weight ratio needed to achieve flight. They switched their design to "what's the simplest way to achieve a dancing robot". Sometimes the simplest answer is the best one.

This idea led to some wicked cool designs! Some students made a robot that looked like a person swimming freestyle (below)

Other students went for the double wind mill approach.

One student designed a race car but with turning arms instead of wheels. He then coded it to go five rotations forwards and then five rotations backwards. on a loop. FOREVER.

Slap a solar charger on that build and it would still be running!

Slap a solar charger on that build and it would still be running!

Finally, it was time to rev up the motors for one final group dance party! This was capped off with Whitefield's very first exploding robot. Shrieks, giggles and merriment were had by all!


WMSI helps Profile students reach for space

There was a pause on the other end of the phone when I called the Lowell Graded School in Lowell, VT on Thursday, November 17th.  I was calling to ask whether we could launch our weather balloon from the sports fields behind their school.  To break the silence, I said, "I bet you have never had that request before."  A chuckle from the other end of the phone was audible before I was put on hold.

Read more

WMSI Mobile STEM Lab Wraps up Spin Art

WMSI STEM Mobile Lab wrapped up spin art sessions around Coos County with a strong showing of excitement and innovation from our STEM Explorers! Arriving in Berlin, we were thrilled to see the smiling faces and minds ready to engage. One student said to me, “robots. Did you say we’re building robots?? Hey mom! I need to tell you something! Jeremy said we’re building robots!” She excitedly ran off to tell her mom. This story sums up our spin art well and highlights what we’re trying to do at WMSI: excite people about creative problem solving.


Indeed, each class had a high level of energy and creativity. Berlin students spent a lot of time on the coding part of the lesson, trying out loops, wait functions, and playing around with different motor speeds (below)

Some students tried out using one color and creating zoom patterns.

Other students went for more of the color explosion approach! (below) Several explorers had the idea of putting down two or three markers at once onto the spinner, creating a very symmetrical rainbow pattern!

In Whitefield, we had 3rd and 4th graders who had never coded before and were flabbergasted at the possibilities! (below)

Three Whitefielders stepped spin art up a notch and turned their project into an “art launcher”, sending a piece of paper skittering off the desk. Giggles were had by all.

012.JPG

We wrapped up spin art in Gorham with an excited bunch students and Youth Leaders! Five of Gorham High School’s most innovative inventors showed up to help the STEM Explorers, bringing knowledge, patience, and some well deserved goofiness! 

Gorham students were particularly interested in color blending, using similar shades to create vortexes and swirls. Artsy!

One group dove into coding, making a complicated spin pattern using loop, wait, and power functions. Cool!

This group below combined spin art with some astronomy and used the robot to make a model of a solar system!

IMG_9535.JPG

At the end of each class we all gathered around and talked about our next session. The new challenge? You must build a LEGO creature that moves; however. you . Can’t. Use. Wheels (Gasps!).

“No way”

“How’s that going to work??”

One student, “I think I have an idea. . .”

We’’ll see how they do after Thanksgiving!


WMSI Mobile STEM Lab Launches!

Today’s very first WMSI stem lab started off with a fire of excitement and enthusiasm which will be a trend in the coming months. Students showed up to Mrs. K’s classroom in Lancaster buzzing with excitement and wondering what cool projects they'd work on with WMSI today. 

WMSI Spin ARt Lancaster 006.JPG

Our first challenge of the year was to build a robot that could make art. Concept-wise, we hoped to teach how gears work, basic programming, and good old creative problem solving. Our youth leaders, John and Ansen, passed out the LEGO pieces and the build was on as the temperature of the room slowly rose with the heat of 17 brains hard at work!

Once the robot was created (a gear attached to a motor that rotated some sweet octopus-like arms, which held a white sheet of paper), all we had to do was program it spin in different patterns. Looks of concentration turned to grins as markers met paper and art time began!

WMSI Spin ARt Lancaster 011.JPG

Students played around with motor speeds as well as loop and wait commands to help them create different pieces of art. Of course, at some point each student couldn’t resist cranking the motor up to 100% and letting the spin art zoom! (below)

Overall, it was a huge success with two thumbs up!